There are four leg exercises every athlete should do. You’re probably already doing three of them: Squats, Deadlifts and Rear-Foot Elevated Split Squats. But the fourth exercise—the Hip Thrust—isn’t so common. Though it most certainly should be.
What Is a Hip Thrust?
The Hip Thrust is a glute exercise designed to improve your strength, speed and power by teaching optimal hip extension. What is “optimal hip extension,” and why should you care about it? It’s all about the power in your glutes, which are among the most powerful muscles in your body. The glutes are designed to extend the hip or pull the leg behind the body. If your glutes are underdeveloped, your speed, power and strength are all compromised. That means you’ll have weaker Squats and Deadlifts as well as slower 40-Yard Dash times and lower vertical jumps than you could have otherwise. Aren’t those the things you’re trying to improve?
A lot of exercises that improve leg strength, like Leg Presses or Squats, don’t maximize hip extension. When we rack up the Leg Press with a bunch of 45’s, or only Squat halfway down—which is as far as people go when their thighs are parallel to the ground—we aren’t fully engaging our glutes. It may look cool to lift all that weight, but your glutes aren’t doing all of the work they could be or should be.
See how the Hip Thrust is performed.
Enter the Hip Thrust

If you want to learn how to properly perform this exercise, you should look no further than Bret Contreras. Contreras is the glute and Hip Thrust master. Everything that you’ll ever need to know about the exercise can be viewed here.
To perform the exercise, all you need is a low bench (16 inches or shorter) and a barbell. If you use lighter weights (less than 135 pounds), it can be hard to place the bar on your pelvis due to the size of the smaller plates. When you start lifting at least 135 pounds, it becomes a lot easier to set up for the lift, because your legs can slide under the bar.
The bar should go directly on your upper thigh, directly below your crotch. Be careful for obvious reasons! The pressure can greatly increase when you start lifting heavier weights. Using a pad or towel helps relieve the pressure. I like an Airex Pad.
Once you have the bar in your lap, the next thing to do is get set up for your first repetition. I find it most comfortable to place the edge of the bench pad across the middle part of the back—right below the shoulder blades. When you lift heavier weights, you need to use your elbows to raise your body to set up the lift. It’s almost like doing a Bench Dip but with your elbows. This can get tricky, so make sure you have weight clips on each side.
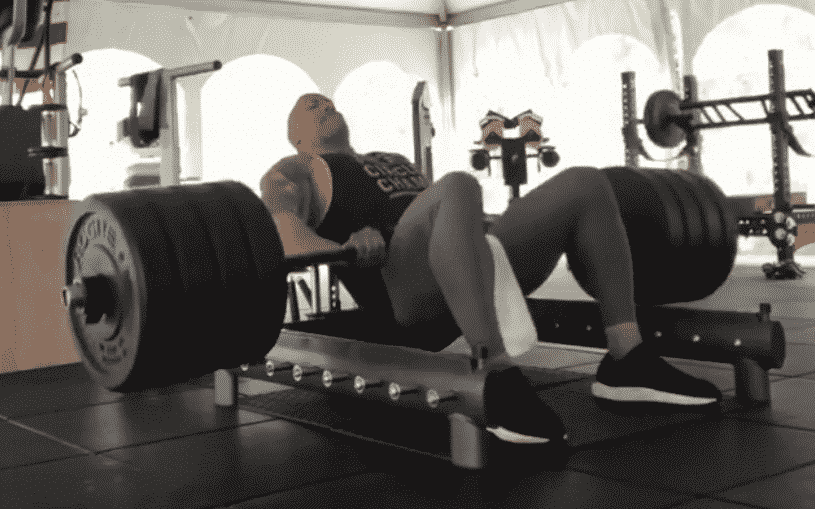
Here’s what it looks like:
Hip Thrust Starting Position

Hip Thrust Bridge Position

Placement of Feet, Neck and Hands
Your feet should be directly under your knees, so when you fully extend into the lift, your knees make a 90-degree angle with the ground. Your neck should always remain neutral. Pretend you have an egg under your chin throughout the lift—if you squeeze too hard, you’ll break it, or if you lift up your chin, you’ll drop it. Place your hands on top of the bar once you have lifted it off the ground.
Once you have taken the necessary steps to set up the thrust properly, use correct form throughout the lift. It’s important to engage your glutes throughout the lift. I spend a few seconds visualizing my brain sending messages to my glutes to help my body understand where I should be “feeling it.” It is common for some athletes to feel it in their quads, hamstrings and lower back. I suggest moving your feet around until you feel your glutes maximally engaged. Once you have completed the upward portion of the thrust, tuck your butt under the bar. This is referred to as a posterior tilt. The lift should be executed smoothly with the glutes lifting the majority of the weight. It’s not the end of the world if you feel it in your lower back—but that’s probably a sign that it’s weak. If you perform it properly, you should feel a nice strong pump in your glutes after the fourth or fifth set.
Rep Range and Rest Interval
Perform sets of 6-12 reps, resting 1-3 minutes between sets. I suggest an initial warm-up set and then 4-6 sets in a pyramid style, increasing the weight and lowering the reps on sets 1-3, resting 1 minute between sets until set 3, then resting 2-3 minutes between additional sets. On sets 4-6, lower the weight and increase the reps. It’ll look like this:
- Set 1= 12 reps (rest 1 minute)
- Set 2=8 reps (rest 1 minutes)
- Set 3= 6 reps (rest 2-3 minutes)
- Set 4= 8 reps (rest 1 minute)
- Set 5= 10 reps (rest 1 minute)
- Set 6=12 reps.
Common Mistakes
As with any lift, there are plenty of things you can do wrong when you do Hip Thrusts. The main mistakes I’ve observed include:
- Not maximizing the full range of motion or stopping short of thighs parallel to the ground
- Placing the feet too far in front or pressing through the toes, or heels come off the ground
- Putting the bar too close to the neck or lower back
- Hyperextending the lower back at the end of the lift and not maintaining a neutral spine
- Jerking the weight off the floor
The biggest problem I have seen with the Hip Thrust is using weight that is too light. Your glutes are strong; you need to lift heavy. Some of the female athletes I train can thrust more than 250 pounds for 10 reps—and that’s only 75 percent of their max It should also be noted that you can expect slight bruising if you do not use a pad.
But to make this movement more comfortable and to perform it correctly Matrix have created the Hip Thrust Glute Trainer which is a dedicated piece of equipment designed to perform this exercise safely and correctly along without the akwardness of using a barbell with padding etc. to make it bearable. Element Fitness is very excited to have this piece of equipment in our facility which not a lot of other gyms have!